This is a simple news slider I put together using SharePoint web services, jQuery and the Easy Slider Plugin from CSS Globe. You can get the plugin here. The Web Part points to the local site’s Annoucements list and display the title, body and a link to view the item. The jQuery connection to the SharePoint web service is based on code from Jan Tielens.
Installation
4 simple steps.
- Paste the code below into a Content Editor Web Part (CEWP) on your page.
- Change the link to jQuery if needed. The code references the jQuery library on Google Code so if you are working in an isolated environment or already have jQuery on your server just change the link (its on the first line).
- Put the Easy Slider code in a document library and adjust the link to it on the second line of the code.
- Update the CSS to match your site (The CSS can be moved to an external file or added to your custom theme).
Code
/*Link to jQuery change this to point to where you have the jQuery files */
<script type="text/javascript" src="js/jquery-1.3.2.min.js"></script>
/*Change this to point to the plugin file on your sever */
<script type="text/javascript" src= js/easySlider1.5.js></script>
<script type="text/javascript">
       $(document).ready(function() {
        var soapEnv =
            "<soapenv:Envelope xmlns:soapenv='http://schemas.xmlsoap.org/soap/envelope/'> \
                <soapenv:Body> \
                     <GetListItems xmlns='http://schemas.microsoft.com/sharepoint/soap/'> \
                        <listName>Announcements</listName> \
                         <viewFields> \
                            <ViewFields> \
                               <FieldRef Name='Title' /> \
                               <FieldRef Name='Body' /> \
                               <FieldRef Name='ID' /> \
				<FieldRef Name='FileDirRef' /> \
                           </ViewFields> \
                        </viewFields> \
                    </GetListItems> \
                </soapenv:Body> \
            </soapenv:Envelope>";

        $.ajax({
            url: "_vti_bin/lists.asmx",
            type: "POST",
            dataType: "xml",
            data: soapEnv,
            complete: processResult,
            contentType: "text/xml; charset=\"utf-8\""
        });
    });

    function processResult(xData, status) {
        $(xData.responseXML).find("z\\:row").each(function() {
        	var teaser = $(this).attr("ows_Body");
        	var teaserText = teaser.slice(0,500);
        	var urlValue = $(this).attr("ows_FileDirRef");
			var urlArray;
			var urlName;
			     if (urlValue == undefined)
	    	{
      		urlName = "- - -";
        	}
        	else {
        		urlArray = urlValue.split(";#");
        		urlName= urlArray[1];
        	}

            var liHtml = "<li><h5>"	+ $(this).attr("ows_Title") + "</h5><p>" + teaserText +
            "<br/><a class='readMore' href='/" + urlName + "/Dispform.aspx?ID=" + + $(this).attr("ows_ID") + "'>Read More<a/></p></li>";
            $("#tasksUL").append(liHtml);
        });
        $("#slider").easySlider({
			controlsBefore:	'<div id="controls2">',
			controlsAfter:	'</div>',
			auto: true,
			continuous: true,
			//vertical: true,
			prevText: '< Prev',
			nextText: 'Next >',
			speed: 1000,
			pause: 4000
			});
        }
</script>
<style type="text/css">
#slider{font-size:x-small; background:#E2EFFF;}
#slider h5{padding:5px; font-size:small; color:#315F9B; letter-spacing:-1px; line-height:20px;margin:0px;}
#slider div {font-size: x-small; padding:0px; margin:3px;}
#slider ul, #slider li{margin:0; padding:0; list-style:none;}
#slider li{width:600px;	height:241px; overflow:hidden; padding:0px;}
#controls2 {padding:3px 0 0 0; text-align:right; width:600px;}
.readMore {margin:3px;padding:2px;background:#F7FBFF;}
#prevBtn, #nextBtn{}
#nextBtn{}
#prevBtn a, #nextBtn a{font-size:x-small;}
#nextBtn a{}
</style>
   	<div id="slider">
		<ul id="tasksUL"/>
	</div>
Enjoy
Notes
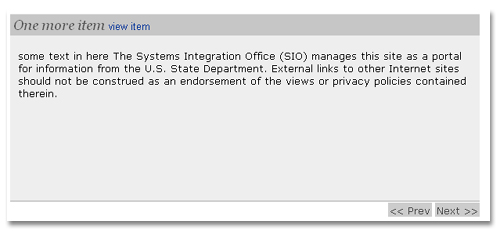
Announcements with really long bodies will get cut off because the div that holds the contents has a fixed height. This can be adjusted in the CSS. Long titles could also cause a problem if they wrap to multiple lines. One other thing to watch out for is inline styles applied by the WYSIWYG editor on the body of the announcement. They can override the default styles and cause items to look different.
Changing whats displayed
To change which fields are displayed edit the section and add a tag for the fields you want to reference. If you have customized your list or renamed fields the names that appear on the column headings and on the list settings page may not be correct. The fastest way to find the real name of a field is to go to the list settings page and click on the name of the column to edit it. On the edit page look at the very end of the URL and it will say Field=[real name of your field].
Once you have edited the added the all you need to do is edit the liHtml var to include the new field in the output html. To show the field just use this $(this).attr(“ows_MyFieldName”).
Upate
New Stlyes for the slider. A little less grey and will match better with a default SharePoint theme
<style type="text/css">
#slider{font-size:x-small; background:#E2EFFF;}
#slider h5{padding:5px; font-size:small; color:#315F9B;
letter-spacing:-1px; line-height:20px;margin:0px;}
#slider div {font-size: x-small; padding:0px; margin:3px;}#slider ul, #slider li{margin:0; padding:0; list-style:none;}#slider li{width:600px;	height:241px; overflow:hidden; padding:0px;}#controls2 {padding:3px 0 0 0; text-align:right; width:600px;}.readMore {margin:3px;padding:2px;background:#F7FBFF;}#prevBtn, #nextBtn{}#nextBtn{}#prevBtn a, #nextBtn a{font-size:x-small;}#nextBtn a{}</style>
Conclusion
This is very basic but provides some nice functionality and can be easily styled to match your site. Because it uses the web service instead of a data view webpart it is portable and will work on any site with an announcements list. With some more work on the JavaScript it would be simple to limit the amount of text from the body that is displayed.
Sorry it appears my comment posted wierd. feel free to e-mail me for more info.