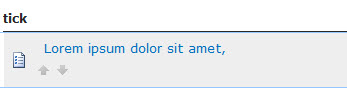
I have written about making a News Ticker before but it looks like the code is not working anymore so why not make something better. News tickers are a great way to show a lot of information in a small space and they look much better than an annoucements web part. For this example I established a few ground rules.
- Content will be pulled from a custom SharePoint list.
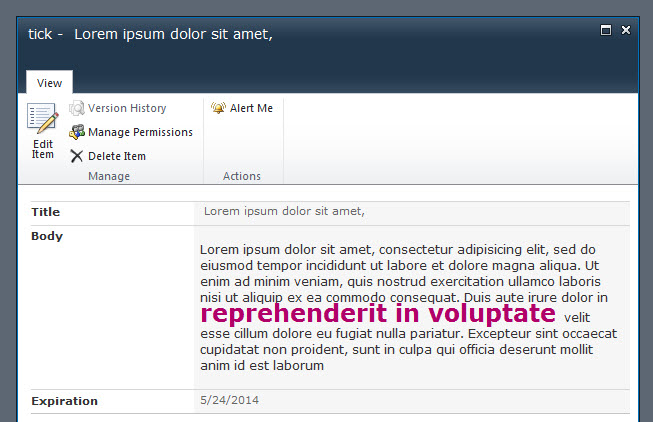
- When clicked the items will open in a dialog window
- The ticker will pause on hover and have controls so users can scroll through the news items
The list
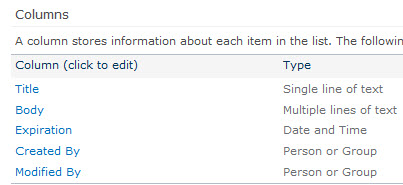
For the list I used the following columns.
- Title – single line of text
- Body – Rich text
- Expiration – Date
To deliver the desired effect I will use jQuery and this ticker plugin. For this solution to work both of these scripts will need to be added to the page. I generally load scripts in one of the following ways:
- In the masterpage – I do this for scripts I know will be needed on almost every page of the site. This saves time instead of having to manually include the reference to the script multiple times in individual papges.
- In the page layout – If the site I am working on uses the publishing feature and only certain pages will need the scripts I include them in the AdditionalPageHead section of the page layout.
- In a content editor web part – I use this method when I know I will only need the script on one page.
Implementation is up to you. Here is what you will need to add.
<script>// <![CDATA[
window.jQuery || document.write('<script src="/Style Library/jquery.min.js"><\/script>')
// ]]></script><script src="/Style Library/jquery.easy-ticker.min.js">// <![CDATA[

// ]]></script>
Now we need to add some content to the page from our list. I setup the dataview web part to only show the items in sets of 10 and to only display items that have not expired. Here is the xsl code I used to display the items from the list. In the code I have used the method described here to open the links in a dialog window.
	<XSL><xsl:stylesheet xmlns:x="http://www.w3.org/2001/XMLSchema" xmlns:d="http://schemas.microsoft.com/sharepoint/dsp" version="1.0" exclude-result-prefixes="xsl msxsl ddwrt" xmlns:ddwrt="http://schemas.microsoft.com/WebParts/v2/DataView/runtime" xmlns:asp="http://schemas.microsoft.com/ASPNET/20" xmlns:__designer="http://schemas.microsoft.com/WebParts/v2/DataView/designer" xmlns:xsl="http://www.w3.org/1999/XSL/Transform" xmlns:msxsl="urn:schemas-microsoft-com:xslt" xmlns:SharePoint="Microsoft.SharePoint.WebControls" xmlns:ddwrt2="urn:frontpage:internal">
	<xsl:output method="html" indent="no"/>
	<xsl:decimal-format NaN=""/>
	<xsl:param name="dvt_apos">'</xsl:param>
	<xsl:param name="ManualRefresh"></xsl:param><xsl:variable name="dvt_1_automode">0</xsl:variable>
	<xsl:template match="/">
		<xsl:choose>
			<xsl:when test="($ManualRefresh = 'True')">
				<table width="100%" border="0" cellpadding="0" cellspacing="0">
					<tr>
						<td valign="top">
							<xsl:call-template name="dvt_1"/>
						</td>
						<td width="1%" class="ms-vb" valign="top">
							<img src="/_layouts/images/staticrefresh.gif" id="ManualRefresh" border="0" onclick="javascript: {ddwrt:GenFireServerEvent('__cancel')}" alt="Click here to refresh the dataview."/>
						</td>
					</tr>
				</table>
			</xsl:when>
			<xsl:otherwise>
				<xsl:call-template name="dvt_1"/>
			</xsl:otherwise>
		</xsl:choose>
	</xsl:template>
	<xsl:template name="dvt_1.empty">
		<xsl:variable name="dvt_ViewEmptyText">There are no items to show in this view.</xsl:variable>
		<table border="0" width="100%">
			<tr>
				<td class="ms-vb">
					<xsl:value-of select="$dvt_ViewEmptyText"/>
				</td>
			</tr>
		</table>
	</xsl:template>
	<xsl:template name="dvt_1">
		<xsl:variable name="dvt_StyleName">BulTitl</xsl:variable>
		<xsl:variable name="Rows" select="/dsQueryResponse/Rows/Row" />
		<xsl:variable name="dvt_RowCount" select="count($Rows)" />
		<xsl:variable name="dvt_IsEmpty" select="$dvt_RowCount = 0" />
		<xsl:choose>
			<xsl:when test="$dvt_IsEmpty">
				<xsl:call-template name="dvt_1.empty" />
			</xsl:when>
			<xsl:otherwise>
				<div class="newsWrap">
<div class="newsTicker">


				<ul>
					<xsl:call-template name="dvt_1.body">
						<xsl:with-param name="Rows" select="$Rows" />
					</xsl:call-template>
				</ul>
				</div>
				<div class="cntrl">
					<a href="#" title="Scroll Up" class="tickerControlUp"></a>
					<a href="#" title="Scroll Down" class="tickerControlDn"></a>
					<!--a href="#" class="tickerControl">Play</a--></div>
				</div>
			</xsl:otherwise>
		</xsl:choose>
	</xsl:template>
	<xsl:template name="dvt_1.body">
		<xsl:param name="Rows" />
		<xsl:for-each select="$Rows">
			<xsl:call-template name="dvt_1.rowview" />
		</xsl:for-each>
	</xsl:template>
	<xsl:template name="dvt_1.rowview">
		<li class="ms-vb">
			<a href="javascript:OpenPopUpPage('{@FileDirRef}/Dispform.aspx?ID={@ID}');" title="{@Title}"><xsl:value-of select="@Title" /></a>
		</li></xsl:template>
</xsl:stylesheet></XSL>
To make everything work we need to add some more JavaScript to the page. You can adjust the settings to meet your needs, checkout the plugin documentation if you need help with the configuration. Here is the code I used.
<script>// <![CDATA[
$(document).ready(function (){
$('.newsTicker').easyTicker({
	direction: 'down',
	easing: 'swing',
	speed: 'slow',
	interval: 2000,
	height: 'auto',
	visible: 1,
	mousePause: 1,
	controls: {
		up: '.tickerControlUp',
		down: '.tickerControlDwn',
		toggle: '.tickerControl',
		playText: 'Play',
		stopText: 'Stop'
	}
});
});
// ]]></script>
To make it all look better I added some basic CSS.
.newsWrap /* wrapper for the ticker */
 {background:#eee url('/_layouts/images/doc_sp16.gif') no-repeat 7px center; padding:7px 7px 7px 30px;}
.newsTicker /*div to hold the ul */
{list-style:none; margin:5px; font-size:13px;}
.tickerControlDwn /* button to scroll the ticker down */
{background:#eee url('/_layouts/images/arrdowni.gif') no-repeat center center; width:15px; height:15px; display:inline-block; margin:2px; }
.tickerControlUp /* button to scroll the ticker up  */
{background:#eee url('/_layouts/images/arrupi.gif') no-repeat center; width:15px; height:15px; display:inline-block;margin:2px; }
Notes
The are many ways to extend this solution to offer more functionality.
- I had planned to add a link to all of the ticker items but it would have to be hard coded.
- The ticker could be updated to display an exerpt of the body for each item instead of just the title.
- With a little CSS its easy to make this ticker match the style of your site.
If you have any questions feel free to post a comment.